> ## Documentation Index
> Fetch the complete documentation index at: https://docs.goshippo.com/llms.txt
> Use this file to discover all available pages before exploring further.
# Webhook security
> Secure your Shippo webhooks using IP allowlists, self-generated URL tokens, or HMAC-based message authentication.
Shippo has three options that you can use to help you protect the integrity of your [webhook](/docs/Tracking/Webhooks).
The three options for securing your webhook are as follows.
* [Inbound IP allowlist](#inbound-ip-allowlist)
* [Self-generated tokens](#self-generated-tokens)
* [HMAC](#hmac-security)
You can choose any one of these options or combine multiple options.
## Inbound IP allowlist
The first option is to add Shippo’s IP range to your inbound allowlist and ignore messages that did not originate from those addresses. Add the following Shippo IP addresses to your inbound allowlist.
### US region
```
52.4.41.98
52.23.121.194
52.44.110.80
54.81.253.187
54.81.255.221
```
### EU region
```
34.248.247.69
34.253.119.130
52.214.174.64
54.72.179.250
```
## Self-generated tokens
You can add self-generated tokens to the end of the request URL query parameter like [https://myurl.com/?token=123abc](https://myurl.com/?token=123abc) when you create your webhook using the Shippo webapp.
To generate a webhook, follow these steps:
1. Sign in to your [Shippo account](https://goshippo.com/login/)
2. In the left hand menu, click **Setting**, then **API**
3. In the API menu, find the **Webhooks** section
4. Click **Add webhook** to create a new webhook
5. Enter your **Event Type**, **Mode**, and **URL**.
6. In the URL field, add your self-generated token to the end of your tracking URL, in the format ?token=123abc, where “123abc”, is your self-generated token.
7. Click **Save**
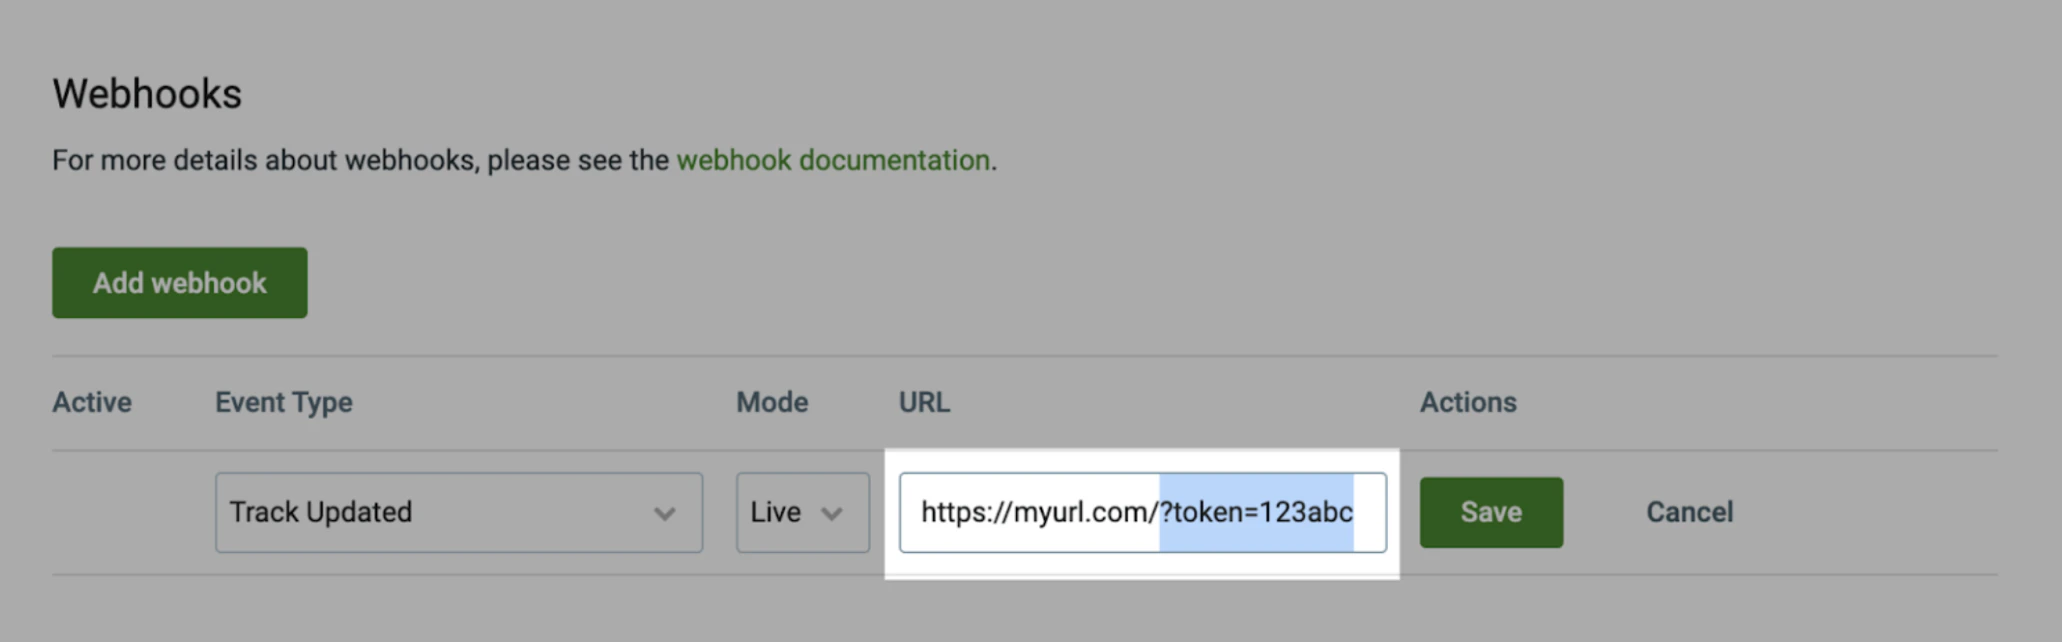 You will be able to see the same token as a query parameter returned in your webhook POST call. This method is secure as long as you protect the storage of the expected token.
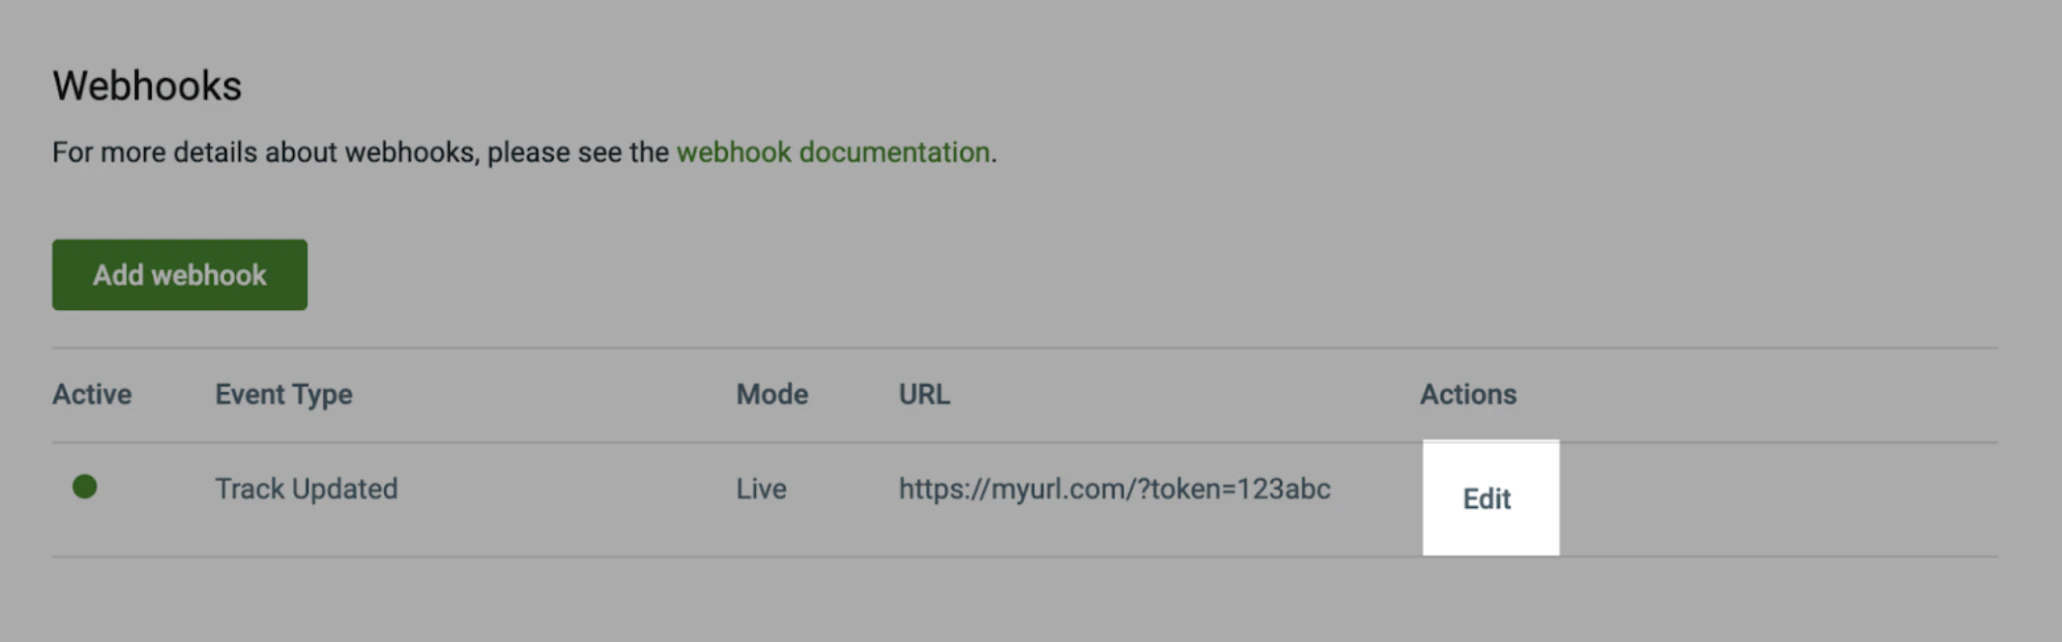
You can add a self-generated token to an existing webhook by clicking **Edit**.
You will be able to see the same token as a query parameter returned in your webhook POST call. This method is secure as long as you protect the storage of the expected token.
You can add a self-generated token to an existing webhook by clicking **Edit**.
 ## HMAC Security
Hash-based Message Authentication Code [HMAC](https://en.wikipedia.org/wiki/HMAC) security is a combination of a security hash shared from you to Shippo and a second from Shippo to you. This is more secure because the tokens are known systemically to each recipient of a request or response and block attacks such as a man in the middle.
To set up HMAC for webhooks, email your account manager with the following subject line or contact our [sales team](https://goshippo.com/become-a-shippo-partner) adding the following to the `Additional Details:` section.
```
HMAC Webhook Setup for
```
Shippo will setup a token and our solutions team will contact you to setup the token exchange. This can take up to 10 business days to complete.
### Verifying your webhooks HMAC
Use the following bash script to verify your HMAC has been configured correctly for your webhook.
```bash theme={null}
#!/bin/bash
# Received from Shippo solutions team
secret=''
# identify signature header & body payload
payload=$(cat)
# $HTTP_SHIPPO_AUTH_SIGNATURE: t=1688493073,v1=24036c00f9adad56ad83504e5dce63fe0a248631865a89fe9adb9494f6dc7c0b
sig_header=$''
# extract timestamp and signature from header
timestamp=$(echo $sig_header | cut -d',' -f1 | cut -d'=' -f2)
signature=$(echo $sig_header | cut -d',' -f2 | cut -d'=' -f2)
# create "signed payload" string
signed_payload_string="${timestamp}.${payload}"
# compute the expected signature
test_signature=$(echo -n "${signed_payload_string}" | openssl dgst -sha256 -hmac "${secret}" | cut -d' ' -f2)
# verify the request signature matches the expected signature
if [ "${signature}" != "${test_signature}" ]; then
echo 'Invalid signature!'
fi
```
## HMAC Security
Hash-based Message Authentication Code [HMAC](https://en.wikipedia.org/wiki/HMAC) security is a combination of a security hash shared from you to Shippo and a second from Shippo to you. This is more secure because the tokens are known systemically to each recipient of a request or response and block attacks such as a man in the middle.
To set up HMAC for webhooks, email your account manager with the following subject line or contact our [sales team](https://goshippo.com/become-a-shippo-partner) adding the following to the `Additional Details:` section.
```
HMAC Webhook Setup for
```
Shippo will setup a token and our solutions team will contact you to setup the token exchange. This can take up to 10 business days to complete.
### Verifying your webhooks HMAC
Use the following bash script to verify your HMAC has been configured correctly for your webhook.
```bash theme={null}
#!/bin/bash
# Received from Shippo solutions team
secret=''
# identify signature header & body payload
payload=$(cat)
# $HTTP_SHIPPO_AUTH_SIGNATURE: t=1688493073,v1=24036c00f9adad56ad83504e5dce63fe0a248631865a89fe9adb9494f6dc7c0b
sig_header=$''
# extract timestamp and signature from header
timestamp=$(echo $sig_header | cut -d',' -f1 | cut -d'=' -f2)
signature=$(echo $sig_header | cut -d',' -f2 | cut -d'=' -f2)
# create "signed payload" string
signed_payload_string="${timestamp}.${payload}"
# compute the expected signature
test_signature=$(echo -n "${signed_payload_string}" | openssl dgst -sha256 -hmac "${secret}" | cut -d' ' -f2)
# verify the request signature matches the expected signature
if [ "${signature}" != "${test_signature}" ]; then
echo 'Invalid signature!'
fi
```